During the summer of 2001 we finally started to work on the windows and doors. Cutting out these holes in the cabin is very nerve wracking. You can't change your mind, ever! Measure 57 times and cut once I always say (especially after I almost put the door in the wrong spot). I used lathe to outline the edges of the windows both inside and out. You can see them through the seams and line them up and use them as cutting guides. I used my handy (and light) electric chain saw for all delicate cutting. Make many small shallow passes first from the outside then from the inside. Don't try to just go through in one cut.
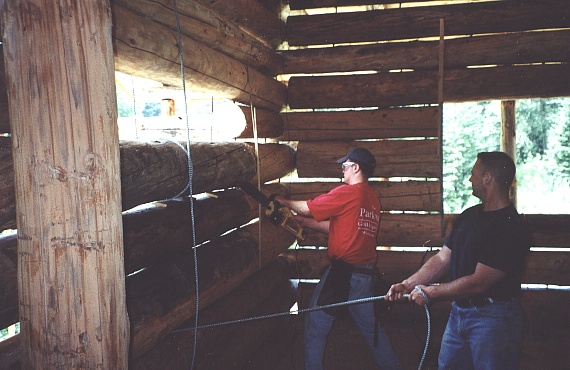
Also belay the logs as you cut them out, this keeps them from binding on the saw when they begin to sag and dropping on your toes when you cut through. That's what the man in the black shirt is doing (no, he's not the supervisor).
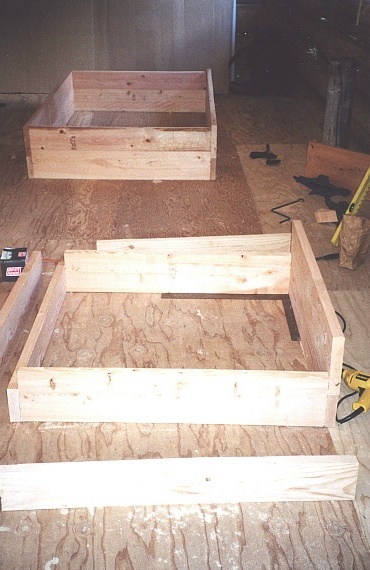
The walls were between 13 and 15.5 inches thick, so the window frames needed to be custom jobs. I made them out of 2x 8s and 2x10s glued, doweled and screwed together. You can build the frames in place if you want to but if you have a window whose top or bottom ends in a seam instead of against a log, this way is easier. Once the frames were built, I used a rubber mallet to pound them into position. You may have to go back and forth with the electric chain saw, cutting out small amounts of wood from the hole as well.
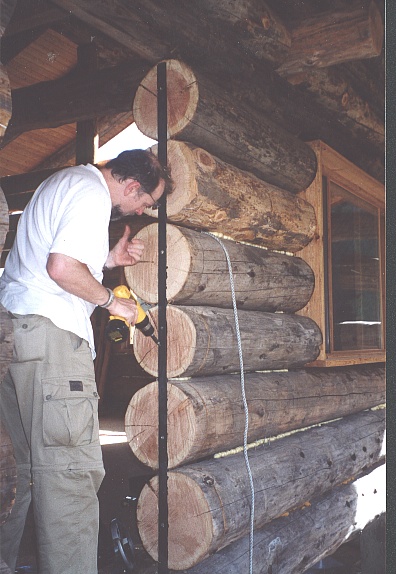
Actual pioneer cabins tended to have very small doorways and no windows to speak of. Part of this was to make the cabin easier to heat and part was to make it more defensible against attack. When you decide to make your cabin more modern looking by putting in huge windows you automatically violate these principles. The butt and pass method has this as a weakness (you knew there had to be one). The walls are very strong when left in one piece but they loose a lot of their structural integrity when you cut the logs in two. The rebar is not strong enough to keep the columns of logs from moving outward with downward pressure. For that reason, it is necessary to add structural elements to keep the logs in line. Here we are installing 2 x.1/2 inch steel bars into a channel routered into the end of the logs. The frames will cover these bars and add additional support. Mortar chinking also adds structure and maintains the spacing between the logs.
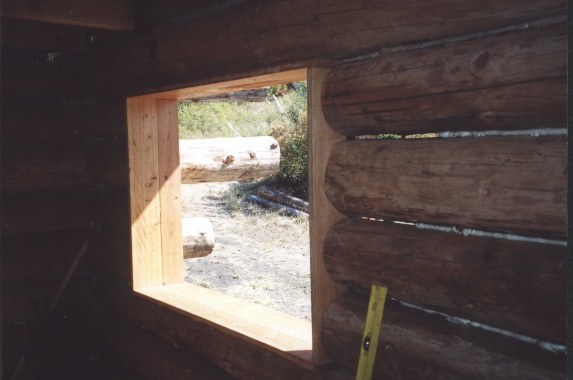
Slide (or pound) the frame into the hole and seal around the outside so no moisture can get in against the cut ends of the log. Be sure to nail the sides of the frame into the ends of the logs to help support them in alignment. The frames are measured to cover the log that sticks out the farthest and the log that sticks in the farthest. As you can see from some of the other pictures, this can get real extreme especially for cuts in the middle of the wall.
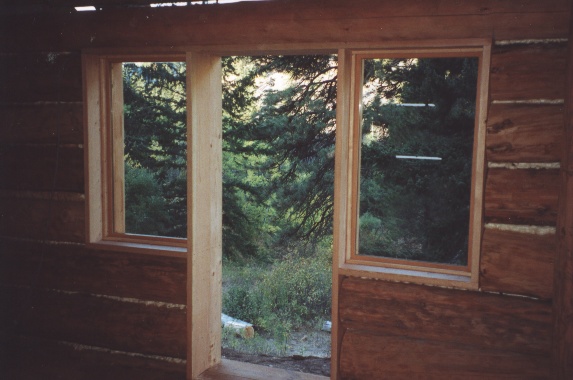
You place the windows in the middle of the frames and "stop" them with cut strips inside and out. Doors are normally mounted on the extreme inner or outer edges of the door frames so that they can swing completely open against the wall. We purchased our windows from Inwood Industries of Woodinville, Washington. Wood windows are a bit pricey but I just couldn't see putting anything else into a log cabin.
Here I have to confess to making an error. As you can see, most of my windows terminate top and bottom in a seam between the logs. This is not the best way to do it. The windows should terminate half way through the logs. The reason this happened is that I planned my windows and put in the order before I built the house and had any idea where the seams would be. Also, designs like this doorway required that the windows be at the same height as the doorway, no matter where that falls. If I had to do it over again, I'd have measured and ordered the windows after the house was built.